Sunday, February 22, 2015

The Laundry Room: Wash Your Knickers and Hang Up Some Pictures

A year ago I decided to start decorating my laundry room. I am lucky enough to have a separate room for laundry on the first floor so I decided, why not make it look cute? I was in there pretreating stains for what seemed like forever, I might as well have something pleasant to look at besides a white wall.

During that time I was off work for 12 weeks following shoulder surgery #2. I took it easy the first 7 weeks, no picking up Jackson (at that time he was 21 months old) or anything heavier than a quart of milk. Needless to say it was hell.

Tasks I took for granted now became excruciatingly hard; taking Jackson upstairs, changing diapers one handed, putting Jackson to bed in his crib or getting him out using two step stools, even doing the dishes (I don't recommend doing dishes with one hand). Some days were better than others. I really don't remember it being that hard the first time around, but then again I didn't have a little one that was still pretty much a baby.

I was determined to get as much done as I could during my time off. I single handedly (seriously I only used my right hand) painted our laundry room and office. I painted our kitchen cabinets (post coming soon!). I also put up much needed artwork in the kitchen and laundry room. I threw in a few crafty endeavors of making wreaths, paintings and decorations for Jackson's monster birthday party. Oh, and (yes, I'm tooting my own horn) we potty trained Jackson by 23 months.

I realized that I could get A LOT of stuff done when I don't come home exhausted from work all the time...*sigh* Oh how I envy you stay at home mamas. 

Now back to the task at hand. I am going to show you my laundry room portraits that were practically free to make with products I had around the house. I am not going to do a full reveal of the laundry room yet because it's not quite done, I have a couple more diy projects up my sleeve.
I really pinterested it up looking for laundry room decorating ideas and I found two simply adorable ones all over Pinterest. Here is a cute example of the first idea at We are THAT family. I, of course, changed mine up to better suit my taste, color scheme and to go with my laundry room theme.
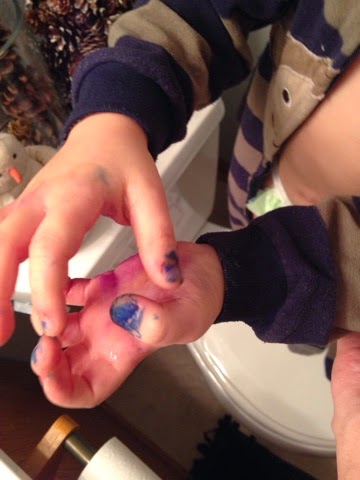
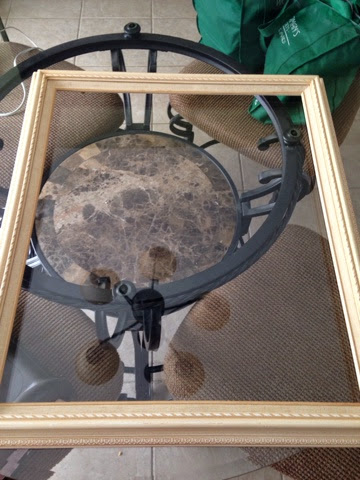
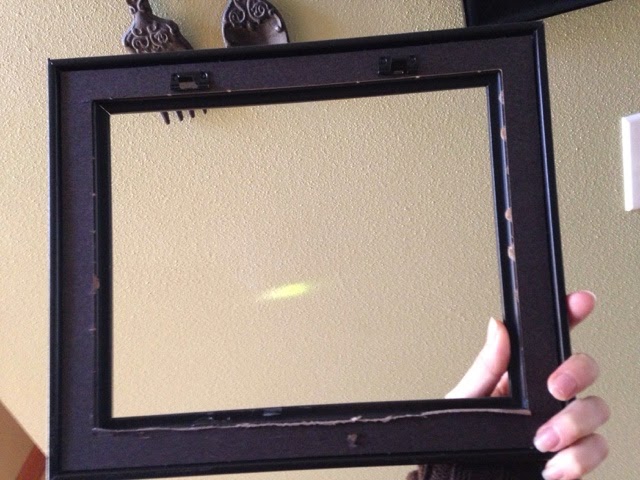
I started with one of my empty frames that I got from a garage sale and painted it black. I then bought a spool of thin wire and some mini clothespins from Walmart for a couple of bucks. I had some black and white square Instagram pictures made since I thought square pictures would look best (and I'm really into square photos right now for some reason). I chose pictures of messy Jackson, Jackson taking a bath and Jackson doing cutesy things in the laundry room. I can very easily change these out as he gets older or if I take a picture that I'd rather have in there. For now I love these!

After I had all my supplies I stapled the wire to the back of the frame. I had to pound the staples down with a hammer so they would lay flat, but hey, it worked! 
After I positioned the wire how I wanted it I simply clothespinned the pictures on, hung the frame and admired. Super easy and super cheap.

My next portrait project was even easier! There were tons of pics using wood pants hangers on Pinterest. Here's a great example at Brit.co along with some other unconventional ways to hang pictures. I again changed it up to suit my laundry room. I simply took a few wood pants hangers (which I use for tube tops) and clamped on (again square) 8x8 black and white photos that I taped, using photo safe two way tape, onto a piece of cardboard. I then hung them up with a couple of nails. That's it. Easy peasy.
I absolutely love how these turned out! Even though I repeated a couple pictures (it's all I could find at the time) I know I will and can easily change them out as Jackson grows. I hung a vintage washboard up along with free laundry room printables (I just love printables!). The one on the left is thanks to My Three Monsters.
I can almost say I enjoy doing laundry now because I get to look up at my sweet peanut while I pretreat 25 pairs of his stained jammies, pants and shirts.

Wednesday, February 18, 2015

It's No Use Crying Over Spilled Nail Polish

I came home from work the other day and the tornado that is Jackson stopped his whirlwind of riding his motorcycle and running around with his hot wheels just long enough to ask what was spilled on the coffee table. I told him I didn't know and continued to made dinner thinking:

1. Why didn't Cory clean it up?!
2. It was probably just juice, milk or some other sticky mystery toddler mess that I could deal with later.

Then Cory started asking what it was and that really sparked my interest.

So I went in the living room to check it out and at first I was confused too. Definitely a mystery toddler mess. Upon further inspection and the clear, strong smell, I realized it was.....dried nail polish. 

DRIED NAIL POLISH!!!!????

Seriously? Now how were we going to get that off? I scraped a thin line off with my nail to see how "stuck" the polish really was. It came off easily but I was so disgusted (with myself basically, since it was my nail polish) that I didn't even try to clean it for a couple weeks.
That was probably not the best idea I've ever had because when I finally went to tackle the purple iridescent monster it was rock hard and wasn't scraping off at all. If only it was like that on my nails...

So a couple weeks after the horrible discovery I caught the cleaning bug (it doesn't happen often, so when it does I go with it!) I started cleaning the living room. Since Jackson had opened up Pandora's drawer of nail polish (that had been closed for years) I cleaned that out so my two year old wouldn't try to paint his nails, or our table, ever again.
Now that's a lot of nail polish I forgot I had!
Since Jackson was napping I decided it was a good time to try to get that ugly stain off. I used my trusted friend Google for advice on this one. I looked at a couple sites and settled on Real Simple's technique. It seemed the least evasive: use a plastic putty knife and a warm wet washcloth to loosen the paint. I thought: Yes! It will just slide right off!!

I sat down with my supplies and got to work. It was slow going to say the least. Only 1 tiny millimeter sized chip came off at a time. Ok, maybe not that small, but still I would have been there til next Christmas if I continued with this technique. 

Cory didn't like me using the putty knife because he thought it would scratch the table so I resorted to my nails. It looked like it was coming off but leaving residue and small marks. (See above picture of atrocious dried nail polish) After what seemed like forever I had a good sized chunk done. 

It looked bad. Not only had I broken a nail but had possibly ruined the coffee table. I guess it didn't really matter since the table is about 17 years old and has scratches and a burn mark (that I cover with coasters) but still we did not want to refinish the table. It would be another project among 1,000 other projects.

Then, of course, Jackson woke up.

Right before I went upstairs to get him I noticed Cory walk in the room with a giant can of acetone. Pretty much every single site I visited said in big bold letters, or in a disclaimer: DO NOT USE ACETONE NAIL POLISH REMOVER.
Honestly I didn't mind that Cory was going to try acetone. Nail polish remover or it's cousin, acetone, were my initial first thought in removing the stain from existence. Also this was originally Cory's coffee table so he could do whatever he wanted to it. I think a small part of me was relieved that I wasn't going to be the only one to ruin the coffee table. Jackson and I watched as Cory used a piece of paper towel soaked in acetone and made light circular motions on the stain. At first it was sticky and we tried to scrape it, but it just globbed up.

So Cory just kept at it, and it looked like the stain was getting lighter. After a minute it looked like it was almost gone! I couldn't believe it but...IT WORKED!!! The clear coat didn't come off AT ALL! It looked like the stain had never been there, all except for the part I scraped off with my fingernail, of course.
  You can barely see where the stain once was!
Maybe it worked because the acetone was old or because it was in the garage. Maybe it worked because the table is such high quality that the clear coat is as hard as diamonds (I REALLY doubt it). Whatever the reason, we'll never know.
I know you really want to see that burn mark under the cleverly placed coasters but I just couldn't bring myself to move them.

My thoughts on this post are this: Sometimes you just need to go with your gut. Especially after you've tried an experts advice and it didn't work out.
Then THIS happened a few days after the nail polish disaster. Jackson was supposed to be coloring a picture while I made dinner...Thank goodness they were washable markers! I swear this kid has never even seen me paint my nails! I haven't had a manicure in at least a year (so sad, I know). Where do little one's learn this stuff?!

Disclaimer: I am by no means a cleaning expert, anyone who's been to my house can attest to that, so if you are going to try using acetone on wood I would recommend doing a small test patch and being mentally prepared to have to refinish your wood product or having friends over for a bonfire.

Sunday, February 15, 2015

Hometalk- the new Pinterest?

I first discovered Hometalk by opening a link in Pinterest. The first couple times it happened I just closed the link thinking: What is this?! Some kind of spam? When it happened a third time I started looking around the site.

I immediately loved it! So much like Pinterest but yet so different at the same time! Real people post and discuss projects they have done and DIY issues they want help with. No recipes, jokes or baby stuff, just simply, home talk.

Don't get me wrong I still LOVE Pinterest (I could easily blow half a day on there). It has always been my go to for inspiration DIY. So, so many of my projects have been influenced because of an awesome Pin!

Now Hometalk is a GREAT additional go to for all things DIY for me!

I do feel like Hometalk is so much more personal than Pinterest though. With Pinterest you just pin stuff you like and it may or may not link to a blog or website with a tutorial. Some of the Pins are dead ends or linked to stores like Etsy, which is fine, you just have to figure out your own way to make things if you're trying to DIY instead of buying a product.

With Hometalk you can not only see the finished product/project but you can talk to the maker. Usually there is a step by step tutorial right there or you can click on a link to a blog or site and find more info. You can also ask the maker questions or let them know you like what they did.

Not only is Hometalk a great place to get home improvement ideas, but it's a great place to inspire others! I posted a couple of projects on Hometalk and got such great responses it was one of my main motivations to start this blog.

Hometalk has definitely helped my blogging experience, they have featured a couple of my projects: my owl artwork and my heart wreath. This week they are featuring one of my boards: kids wall décor. This board has given me tons of new ideas for decorating Jackson's room!

If you are a Pinterest fan (who isn't?!) and you have yet to check out Hometalk, just click on the picture of my board below and take a look around!
http://www.hometalk.com/b/7025193/kids-wall-decor

As Hometalk would say: Happy Hometalking! Hope you find something that will inspire you!


Friday, February 13, 2015

Toddler friendly Valentine's that were heart-ly any work, and a whole lot of fun

Every year since my son Jackson was born he has sent out Valentine's to family and friends. This year he is 2 1/2 around V day so he is old enough to do something more hands on. I came across this brilliant idea that I knew would be perfect for Valentines, from Elizabeth Joan Designs. She made a heart stamp out of an empty toilet paper tube! So simple, so cheap (free!) and so genius! Her kids looked like they had an absolute blast!
It took all of 30 seconds to make these easy (but genius) stamps. I then gathered some white card stock, markers and envelopes from my craft stash. I wanted to make heart shaped Valentines so I reused my idea from last year, tracing a wood heart decoration from my Valentine mantle.
It worked perfectly to fit in a 5x7 envelope. Thanks again wood hearts!
I then wrote out a Valentine message from Jackson and let him create a masterpiece.
After he was done drawing we moved onto making paint. I really wanted to make non toxic, toddler friendly paint and I found the perfect recipe on Tinkerlab. Not only did this site have an easy paint recipe but it has tons of ideas for toddler art projects, science projects and more! This paint was so easy to make Jackson did most of the work! 

I measured the ingredients: flour, salt and water, and he dumped them in the bowl. He even stirred the paint mixture. I split the paint between two bowls and added food coloring and we were good to go.

The paint worked out perfectly. It was thick enough to not make a mess. I was so prepared for a mess, see the bib. The bib was the ONLY thing that got messy because it flipped onto the paper and smeared a heart. I even pushed Jackson's sleeves up several times because he wouldn't keep them down and still NO paint on his clothes!
The paint was also thick enough so that I really didn't have to help at all with the stamping. Jackson pretty much did all the work and we both had a great time!
I swear he would have done 5 more pages if I let him.
He enjoyed himself so much that he kept asking to "paint" again, so the next day he painted with Daddy. I had put the paint in the refrigerator and it still worked just as good the next day with a little stir. This time he put hearts on his Valentine's envelopes.
Not too shabby for using products I had laying around the house.
The paint dried in less than 24 hours and it was rock hard and "puffy". I will definitely be using this paint recipe again!
Here is my favorite one that now sits on our Valentine mantle.
Happy Valentine's Day!!

XOXO-

Sherri

Sunday, February 8, 2015

Valentine Surprise Cupcakes

So I've decided to include some recipes in my blog because I really like eating. Who doesn't?! No, really I enjoy cooking and baking. I seem to have a knack for it, at least everyone who eats my cooking says it's good. They can't all be lying...I hope.

While at work today I had a (what I thought was brilliant) brainstorm to make some cupcakes. Not just any cupcakes, special Valentine's cupcakes. That would include, but not be limited to, chocolate covered strawberries and red velvet oreos. 

Yes red velvet Oreos. It's the latest and greatest flavor Oreo. I thought I would include them in my cupcakes because they're red and they're delicious.
Now I love to cook but sometimes everyday it seems like I'm pressed for time. So I really love semi-homemade cooking. Sandra Lee is my mentor. Seriously though she has some great time and money saving ideas. 

So anytime I come across a cooking recipe, method, product that will save me time, I'm all about it! Today I found baking chocolate in a microwaveable bowl!! No double boiler, no mess, no cleanup!!!
The microwavable chocolate worked like a charm! It couldn't have been easier! It was so easy to get the chocolate ready I decided to have Jackson help dip strawberries.
Jackson's a very classy dipper.
I quickly realized this was not such a good idea.

I cut the strawberries in half that I was going to use for the cupcakes. I was going to dip the rest of the whole ones but someone ate all of them but 3.
I had enough chocolate for all the strawberries and a couple Oreos. Yes, white chocolate covered red velvet Oreos, don't mind if I do.

Before I get too far, here are the ingredients I used:

Fresh strawberries (halved)
White chocolate shell in microwavable container
Strawberry cake mix (prepared with the cupcake directions)
Red velvet Oreos (crushed)
Cream cheese frosting

I made the cupcake batter while Jackson "washed" the dishes in the dish drainer (rinsing and filling them up with water). It kept him out of trouble and it was most definitely training for the real deal (fingers crossed).

I decided I was going to put the chocolate covered strawberries right in the batter and bake them, against the better judgment of Cory's aunt who told me it wouldn't work when I revealed to everyone my baking plans while picking Jackson up. On the way home with Jackson's sweet little voice chanting "frosting surprise cupcakes" from the backseat, I was totally pumped for my cupcakes and just knew it would work!

I put two tablespoons of batter in each cup and then put the strawberry in. I felt they were too close to the top so I gave them each a little push down and topped with one more tablespoon of batter.
It looked pretty good to me so I put them in the oven and patiently waited to see how they turned out!
 I let them cool and I frosted one and sprinkled crushed Oreos on it and then peeled the liner off so I could cut it in half...
Oh the horrors!!!

Yep that sure was a surprise!! I guess I shouldn't have given those strawberries that little shove...Aunt Cheryl was right...

The first batch is now known as the soggy bottom cupcakes.

Not to be let down, I had 12 more cupcakes to make and another suggestion from a master baker Cheryl. I decided to do the next batch by baking the cupcakes like normal, letting them cool, cutting a strawberry sized hole, shoving the strawberry in, and then topping the strawberry with some cake.

This had to work!! I frosted that puppy, oreo'd it, peeled the liner and cut it in half...
Whew! It worked! I almost felt like I was on Cupcake Wars or something.

These cupcakes are super sweet, rich and delicious! They were a ton of work (I would never make it as a cupcake baker) even though they were semi homemade, but totally worth it for a Valentine dessert for my loves.


Tuesday, February 3, 2015

$2 Simple and Sweet Argyle Heart Valentine Wreath

With Valentine's Day fast approaching I decided to make (what else?) a wreath! Making my own wreaths is definitely my new obsession. If they weren't so darn expensive I might have more. But they are, so I'll just make mine for super cheap and be all the merrier because I made it.
It makes me smile when I see my wreaths on my front door when I pull in. But I didn't just want to see my wreaths outside, I wanted a spot for my more delicate, non weatherproof wreaths, like this one, to display inside. So I hung up a large empty frame from my stash of frames that I acquired from a garage sale for $5 for the whole box. The lady practically shoved the overflowing box into my arms as I was looking at one frame that was marked $5 alone. I didn't even have to try to get a deal. People crack me up at garage sales.
It definitely needed a paint job...of crisp, clean white.

Now that I had a spot for "seasonal" wreaths inside the house, I needed a wreath! Pinterest yet again was my go to for this wreath. There were quite a few argyle "heart" wreaths, although all of them were round.  My favorite inspiration by far was by Cass at Remodelaholic. With her detailed tutorial even a monkey could make this wreath.

I was envisioning something a little different with my wreath, a heart shape instead of the classic circle.

First I had to make a heart form...I knew I wasn't going to buy one! So I searched for a cheap, easy diy wreath form. I found the perfect one on fynesdesigns! She had a tutorial laid out in one easy to follow picture!

Basically you get your supplies:

foam pipe cover
wire hanger
pliers
scissors
duct tape
elbow grease

Elbow grease not pictured.

The only supply I didn't have was a pipe cover and it only cost $2.59 at Walmart for a 4 pack! Not only do these pipe covers make great wreath forms but they are awesome swords! Who knew? We had a family sword fight...that I lost miserably at. They totally ganged up on me.

I got started by grabbing a wire hanger from my spare closet, forming it into a heart shape, then cutting a pipe cover in half and taping it together.
 I bent and shaped mine with a needle nose pliers and sheer brute strength while sitting on the toilet watching Jackson take a bath.
Apparently I used Cory's "expensive" duct tape...it did seem to work really good!
I decided to go with a traditional grey yarn to wrap the form since it looks very "argyley" (I like to make up words).
I'm not gonna sugar coat it, this part takes A WHILE. I wrapped half and then got hung up on the bottom of the heart. So I set it aside to start from the top of the other side another day. I came back to it on super bowl Sunday. We got snowed in and instead of moping about missing out on a party, I grabbed a beer and wrapped my little heart out while I glanced up to watch the commercials every once in a while.

Now I was, finally, ready for hearts. I used pink and white felt. I wanted a lighter pink but the store didn't have any light pink, so a medium pink would have to do. I cut one heart out and used that as a template for the rest of them.
I laid all the hearts out where I wanted them. I then attempted glued the hearts on with gorilla glue because I was too lazy to plug in the glue gun (hey, at least I'm honest). I don't think it really helped since the hearts kept falling off when I moved the wreath...
Then I wrapped grey yarn around the hearts to make the argyle look. I tied a piece to the back and made diagonal lines of yarn by wrapping around the wreath on one side of all the white hearts.
When I got to the top I wrapped the yarn around the hanger hook and started wrapping the diagonal lines on the pink hearts.
I kept going, alternating heart colors and sides of the hearts until I had the argyle x's all done. I then tied it off on the back of the wreath. I didn't think it was going to work out at first because of the odd heart shape, but it exceeded my expectations.
Here is the completed wreath hung in my new seasonal wreath display frame. I love it's simple but sweet look, perfect for Valentine's Day! The best thing about it though is it only cost about $2 to make! I only had to buy the pipe cover and pink felt (29 cents at Walmart) since all the other supplies I had in my closet and in with my crafting supplies! This was definitely one of the cheapest wreaths I've ever made!

Sunday, February 1, 2015

Spooning Leads to Forking...and Maybe Even a Spork or Two: Kitchen Spoon Wall Art

When I finally got around to decorating the walls in my kitchen (it only took 4 years) I wanted something a little personal and, of course, handmade. I try to put something I've made in every room of the house, it just makes me feel good to see my artwork adorning our walls.

I kind of have a chicken theme going on in the kitchen...Who am I kidding, chickens rule the roost! There are so many chickens they're pecking their way out of the woodwork! (Did you see what I did with grammar in that sentence!! I'm a total grammar nazi by the way) I may have gone overboard just a cluck. It was just so over(ly) easy to find chicken stuff for kitchens! Ok I'm done with the chicken s#!@.

So one day I saw the cast iron spoon and fork that I had bought at Hobby Lobby 4 years ago stashed in a cabinet and I hatched an idea (last one, I promise) to make some artwork with spoons. A few weeks before that I was doing an image search for free kitchen printables and saw many different photos of two spoons on a canvas with spooning since (insert year here) written under the spoons. I filed the idea away in my mind thinking, that's cute maybe I'll come back to it.

 At this point I realized I had to do something different since Cory's feathers were ruffled and he was starting to say fowl things about my chickens (now I'm really done). I remembered the spoon pictures I had been inspired by and decided to make one of my own.

Spoons are "kitchen-y" and they aren't chickens!


I used an 8x10 canvas from a pack I got at Michael's and hot glued a big spoon and a little spoon on that I picked up at Walmart. I really wanted mismatched antique looking spoons but every time I looked at salvo they were completely out of spoons. They had tons of forks and knives, go figure. When I find the perfect spoons I'll just pull the cheapo Walmart spoons off since they're only hot glued on.

I then wrote out spooning since 2000 with my new best friend, my acrylic paint marker.


I also bought a cheap black 8x10 frame at Walmart, took the glass out and cut out the back. Then I slipped it right onto the canvas to give it a cleaner, more finished look.


My spoon art looks great with the fork and spoon (that I finally hung!) and my free (free is for me!) printable "eat, pray, love" heart thanks to My Mommy Style. Very "kitchen-y".


I'm as happy as a rooster in a hen house with how it turned out.

Blogger template designed By Sherri.